High Altitude Balloon Launch Checklist: Pre-Flight & Recovery Guide
Complete pre-flight checklist for high altitude balloon launches. Weather checks, equipment verification, airspace clearance, and recovery planning for successful HAB missions.
Key Takeaways
- Always check weather 24 hours, 12 hours, and day-of launch
- Verify FAA Part 101 compliance before every flight
- Test all electronics 24 hours before launch
- Have a chase crew and recovery plan ready
- Document everything for post-flight analysis
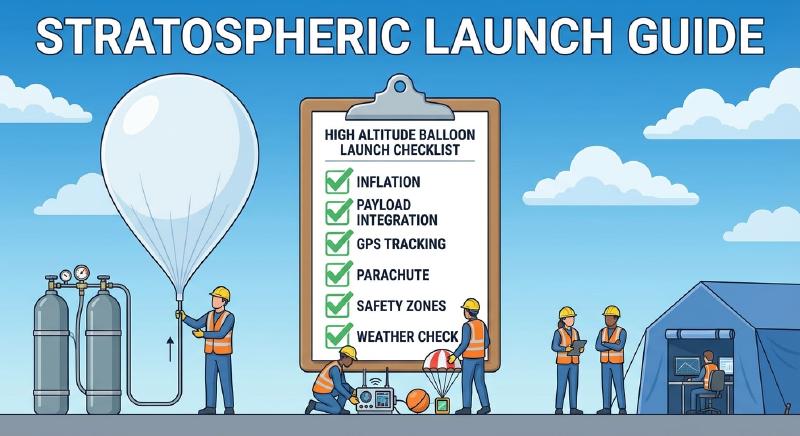
High Altitude Balloon Launch Checklist
A successful HAB mission requires careful preparation. Use this comprehensive checklist to ensure nothing gets overlooked on launch day.
7 Days Before Launch
Planning & Paperwork
- Select launch date and backup date
- Check NOTAM requirements (FAA Part 101)
- File NOTAM if required (24+ hours ahead)
- Notify landowner (if launching from private property)
- Assemble chase crew and assign roles
- Create flight prediction using:
Equipment Inventory
- Weather balloon (check for damage)
- Helium tank (verify volume is sufficient)
- Payload container
- Parachute (size appropriate for payload weight)
- Flight train rigging (cord, swivels, zip ties)
- GPS tracker(s) – always use redundant trackers
- Camera(s) with charged batteries
- Flight computer (if applicable)
- Handheld radio for APRS tracking
- Tools kit (scissors, tape, zip ties, gloves)
24 Hours Before Launch
Weather Check
Check these sources for launch day forecast:
- NOAA Weather (weather.gov)
- Windy.com (wind at altitude)
- Aviation Weather Center (aviationweather.gov)
Acceptable conditions:
- Surface winds under 10 mph
- No precipitation
- Cloud cover under 50%
- No thunderstorms within 100 miles
- Jet stream not directly over launch site
Electronics Testing
- Power on GPS tracker – verify signal acquisition
- Test APRS beacon transmission
- Verify cellular tracker has signal
- Check camera battery levels (>80%)
- Format SD cards / clear storage
- Test flight computer (if using)
- Verify payload weight – confirm under 6 lbs for exemption
Payload Preparation
- Install fresh batteries in all devices
- Mount camera at desired angle
- Secure GPS tracker with padding
- Add hand warmers if cold weather (keep batteries warm)
- Final payload weigh-in
- Label payload with contact information
Morning of Launch (T-2 Hours)
Final Weather Check
- Surface wind conditions acceptable
- No weather advisories
- Cloud ceiling adequate
- Forecast hasn’t changed significantly
Site Preparation
- Arrive at launch site
- Set up launch area (downwind of vehicles/people)
- Lay out tarp for balloon assembly
- Position helium tank
- Assign roles:
- Balloon handler – manages balloon during fill
- Payload specialist – manages payload and attachment
- Documentation – photos/video
- Safety officer – monitors conditions and clearances
Pre-Launch Checks
- Final GPS tracker test (fresh lock)
- Test radio receiver for APRS
- Verify chase vehicles fueled
- Distribute chase crew to recovery positions (if known)
- Set up launch cameras/timers
Launch Sequence
Balloon Inflation (T-30 Minutes)
- Put on gloves (no oils from hands on balloon)
- Attach filler hose to balloon neck
- Begin filling with helium
- Monitor balloon for tears or weak spots
- Calculate lift:
- Target: 1 lb (450g) more lift than payload weight
- Use scale to measure free lift
- Seal balloon with zip ties (minimum 3)
- Attach payload train to balloon
Final Pre-Launch (T-5 Minutes)
- Confirm GPS lock on tracker
- Verify APRS packets being received
- All crew at safe distance (50+ feet)
- Clear airspace (visual scan)
- Photo of payload pre-launch
- Note launch time and coordinates
Launch (T-0)
- Release balloon smoothly
- Confirm payload is lifting
- Verify no tangling in flight train
- Start ascent timer
- Log launch time and GPS coordinates
- Begin tracking on ground station
During Flight
Ascent Phase (0-90 minutes)
- Monitor GPS position every 5 minutes
- Track ascent rate (target: 5-6 m/s or 1000 ft/min)
- Watch for burst prediction
- Log maximum altitude
- Maintain visual contact as long as possible
Burst and Descent
- Note burst time and altitude
- Confirm descent rate is safe (under 15 m/s)
- Track landing zone prediction
- Alert chase crew to new landing area
- Continue GPS monitoring
Recovery
- Navigate to landing coordinates
- Park safely away from landing site
- Approach payload carefully (watch for hazards)
- Photograph payload at landing site
- Secure all components
- Note landing time and coordinates
- Check for damage
- Retrieve all debris (including balloon remnants)
Post-Flight (Within 24 Hours)
Data Collection
- Download photos and video
- Export GPS track data
- Record maximum altitude reached
- Calculate actual ascent/descent rates
- Document flight path
- Compare prediction vs. actual
Equipment Maintenance
- Clean payload container
- Recharge all batteries
- Inspect equipment for damage
- Replace any worn rigging
- Store helium tank properly
Sharing
- Post photos/video online
- Share data with community (Reddit r/HighAltitudeBalloons)
- Submit flight to habhub.org database
- Thank landowner if applicable
- Start planning next flight!
Common Failure Points
GPS Tracker Issues
- Problem: No signal lock
- Solution: Test 24 hours prior, fresh batteries, external antenna if needed
Balloon Burst Early
- Problem: Burst below 60,000 ft
- Solution: Check balloon rating, avoid overfilling, use quality balloons
Payload Loss
- Problem: Recovery failed
- Solution: Redundant trackers, contact info clearly marked, recovery insurance
Tangled Flight Train
- Problem: Payload spinning or not ascending properly
- Solution: Use swivels, keep lines short, avoid knots
Emergency Procedures
If Payload Lands in Water
- Do not enter dangerous water
- Note coordinates and time
- Contact local authorities if hazardous
- Attempt recovery with appropriate water gear
If Payload Lands on Private Property
- Always ask permission before entering
- Respect no-trespassing signs
- Offer to share photos with landowner
- Leave property as found
Lost Contact with Payload
- Continue monitoring for 4+ hours
- Check last known position
- Drive to predicted landing area
- Use directional antennas if available
Recommended Gear List
Essential
- Weather balloon (1200g-2000g recommended for beginners)
- Helium (150-200 cu ft)
- Payload container (Styrofoam cooler or 3D printed)
- GPS tracker (APRS recommended)
- Parachute (36-48" for <6 lb payload)
- Flight train (paracord, swivels, zip ties)
- Gloves (for handling balloon)
Recommended
- Backup GPS tracker (cellular)
- Action camera (GoPro or similar)
- Flight computer (Arduino/Teensy based)
- Handheld APRS radio
- Laptop/tablet for tracking
- Portable power bank
- First aid kit
- Water and snacks for chase crew
Summary
Success is in the preparation. Run through this checklist before every launch, double-check your equipment, and always have backup plans. Most failed launches are due to skipped steps or inadequate testing.
Ready to fly? Browse our HAB Kits to get everything you need.